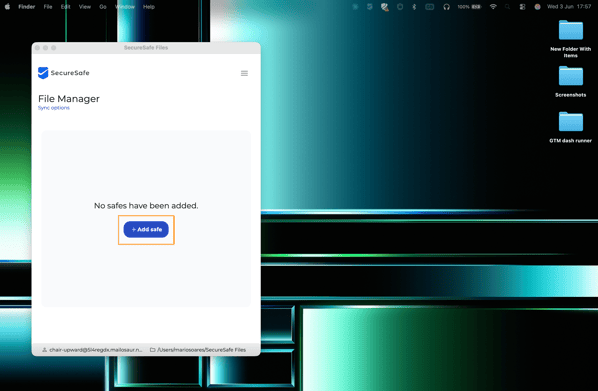
Setting up your Local Safes
Upon your first installation, you will need to add the safes you have access to on your local machine. To do so, click on + Add Safe:
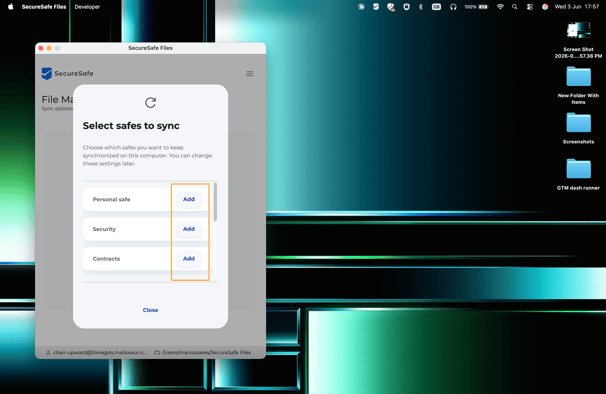
You can select all the safes you want to keep synchronized on your machine so you can work with them locally and always keep them up-to-date. You can add your Personal safe, or any Team safes. To do so, click on “Add”:
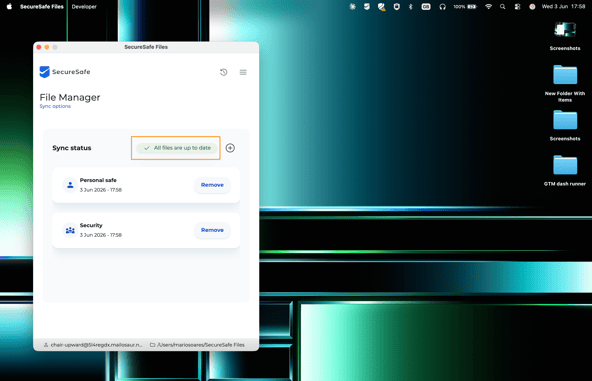
Your safes are now added:
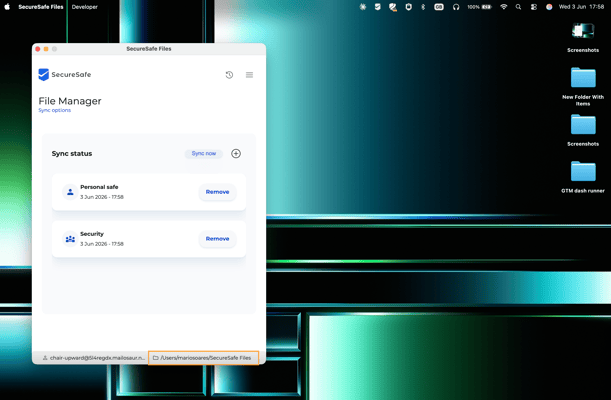
You can trigger your first sync by clicking on Sync now. You will see the sync process ongoing.
As soon as your sync is finished, you will receive a success message:
If you had any errors with the sync process, check out this help article to help you troubleshoot any issues.
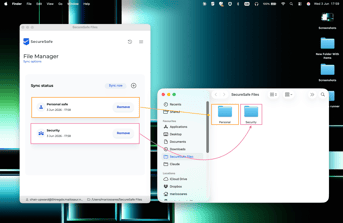
To find the location of these files, click on the path present in the bottom right corner:

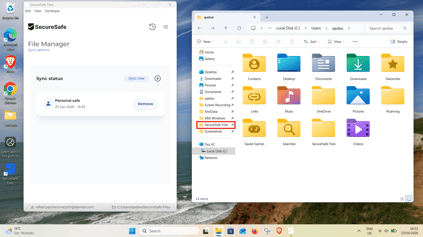
A new Finder (Mac) or File Explorer (Windows) window will open, where your Safes – now folders – will be present:
| Mac | Windows |
 |

|
Adding your SecureSafe Files Folder to your Finder/File Explorer
For easy, everyday access to the SecureSafe Files Folder, which contains all your safes, you can actually add it to your navigation or home screen.
For Mac
Under Locations, go to your username location:
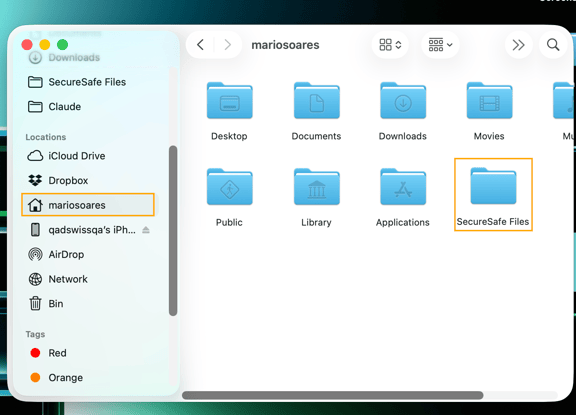
Locate the SecureSafe Files Folder.
You can use a drag-and-drop movement to drag it to your Favorites space in Finder (Mac) or to any other location where it is easily accessible by you.
Your files and folders stored in your Safes on SecureSafe are now easily accessible at any time, anywhere.
For Windows
On your Local Disk, in the Users Folder, find the SecureSafe Files Folder:

You can right click on the SecureSafe Folder, and select pin it to Quick Access:

Your synced SecureSafe Files folder is now accessible on your left navigation menu: