
Overview
SecureSend allows users to securely share multiple files from SecureSafe with internal or external recipients using a protected link. Recipients do not need a SecureSafe account to access shared files. Access is controlled through configurable security options, including expiration, access controls, and notifications.
SecureSend is designed for controlled, temporary file sharing without exposing an entire Safe or requiring external users to onboard into SecureSafe.
What is SecureSend
SecureSend is a secure file-sharing mechanism that generates a protected link to a single file or multiple files stored in a Safe. The link can be shared with specified recipients and configured with access restrictions such as expiration time and a security code.
SecureSend links provide access only to the selected file(s) and do not grant visibility into the surrounding Safe or folder structure.
Prerequisites
To use SecureSend, the following conditions must be met:
-
The sender must have access to the file(s) being shared.
-
The file(s) must reside within a Safe.
-
The sender must specify at least one recipient email address.
-
Recipients must be able to receive the SecureSend link via email.
Recipients do not need a SecureSafe account.
How to create a SecureSend link
-
Navigate to the file(s) within your Safe.
-
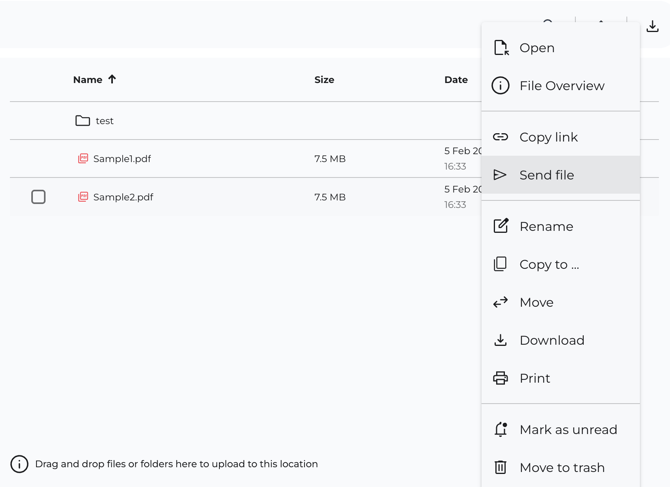
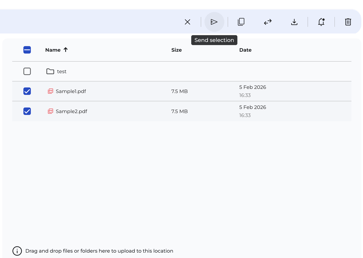
For a single file, open the file’s context menu or file overview context menu, by clicking on the 3 dots and select Send File. For multiple files, click on the checkboxes to select the needed files, and then select “Send“ icon in the action bar above.
| Single File Sharing | Multiple Files Sharing |
 |
 |
-
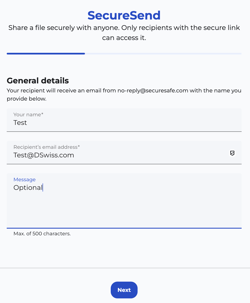
Enter your name and recipient’s email address.
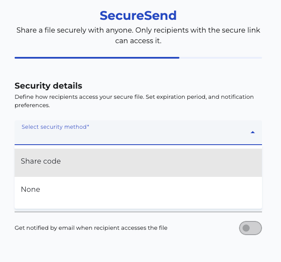
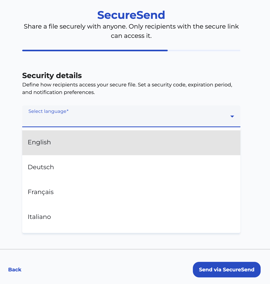
- On the Security details step, choose how recipients access the file. Select Share code to require a code, or None to let recipients download from the link alone.
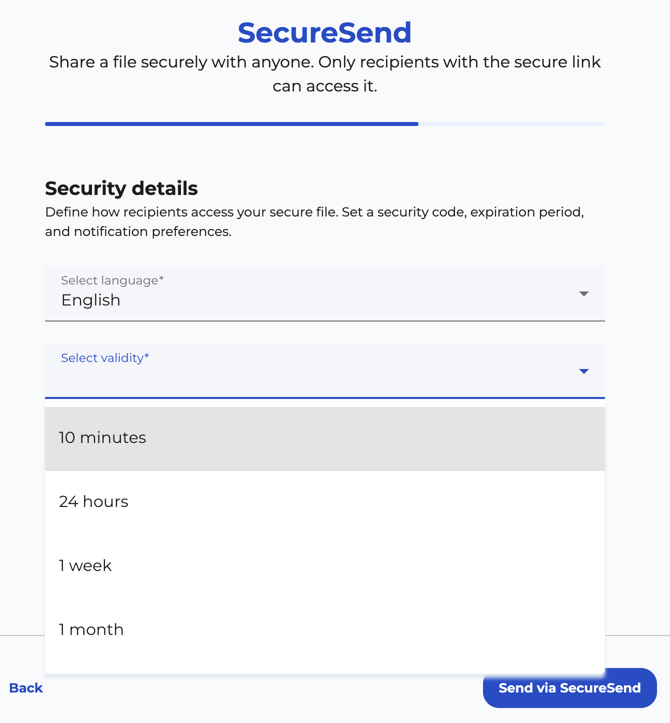
- Then set the recipient’s preferred language, the link validity period, and whether you want an email when the recipient accesses the file.
-
Click on “Send via SecureSend“.
Protecting a SecureSend with a security code
A security code adds a second barrier to a SecureSend link. When it is active, the link alone is not enough. The recipient has to enter the code before the download starts, which protects the file if the email is forwarded or reaches the wrong inbox.
The security code is available in the web app. It works for a single file and for several files sent together, where the recipient receives the selection as a zip archive, and it is available on every plan.
Requiring a code
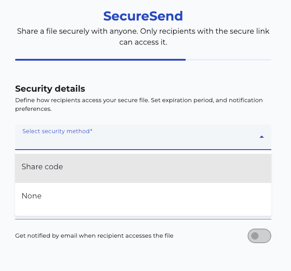
On the Security details step, open Select security method and choose Share code. Choosing None sends the file without a code, and the recipient downloads it from the link alone.
Sharing the code with your recipient
SecureSafe generates the code for you. You cannot set it yourself, and it is deliberately not included in the email that carries the link.
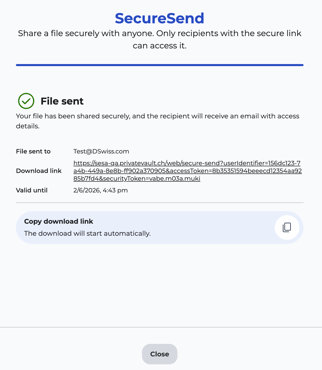
After you click Send via SecureSend, the confirmation screen shows the recipient address, the point at which the link expires, and the code itself. The code is hidden by default. Use the eye icon to reveal it and the copy icon to copy it to your clipboard, then pass it to your recipient through a different channel, for example a phone call, a message, or in person. Keeping the code and the link apart is what makes the second barrier worthwhile.
Good to know:
Copy the code before you leave the confirmation screen.
How your recipient opens the file
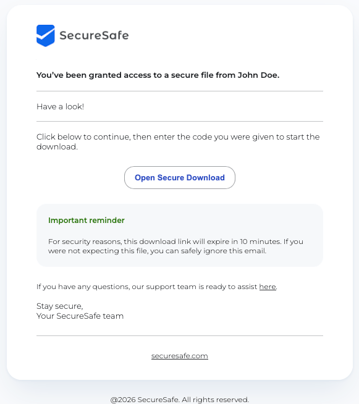
- The recipient receives an email telling them a secure file is waiting and clicks Open Secure Download.
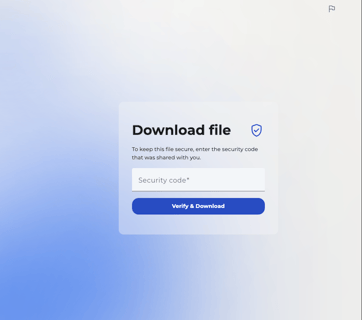
- The download page asks for the security code that was shared with them.
- The recipient enters the code and clicks Verify & Download.
- SecureSafe confirms the file is verified and the download starts automatically. If it does not, the recipient can start it with the download button.
If the code does not match, the recipient sees the message “Please enter a valid code.” and the file is not released. This is the same message for any entry that does not verify, including a code that has already expired along with its link. In that case, ask the sender to send the file again.
Link validity and expiration
When creating a SecureSend, the sender defines how long the link remains accessible. Once the validity period expires, the link automatically becomes inactive and can no longer be used.
Available validity options:
-
10 minutes
-
24 hours
-
1 week
-
1 month
-
Unlimited
Expiration is enforced automatically and does not require manual intervention.
 |
 |
Recipient access behavior
-
The recipient receives a SecureSend email containing the link.
-
The recipient opens the link in a browser.
-
The recipient can access the shared file until the link expires.
Recipients can only access the specific file(s) shared with them.
Permissions and access controls
-
SecureSend links do not grant access beyond the selected file(s).
-
Recipients cannot browse the Safe, folder, or other files.
-
SecureSend does not modify or extend Safe permissions.
-
Access can be restricted or revoked by the sender based on SecureSend configuration.
Typical use cases
-
Sharing documents with clients or external partners.
-
Providing files to auditors or consultants without exposing a Safe.
-
Collaborating with external stakeholders on a single document wihout them needing an account.